
Expose Raspberry Pi to the Internet using Cloudflare Tunnel
I’ve been using Raspberry Pi from past 6 years as a file sharing and media server. This year I bought the latest version of Pi on an impulse and now I have no idea what to do with it.
The official website describes Raspberry Pi as
a low cost, credit-card sized computer
Some websites like - This Blog Is Now Running on Solar Power gave me an inspiration to host a website on my Raspberry Pi. The content for the website can be added later when I’ll put my development skills to use, but at that moment I thought that it would be really cool to host a website straight our of my Raspberry Pi.
If I wish to host a server from my home network:
- I would require a Dynamic DNS since I do not have a static IP.
- A script to update the DDNS entry incase my IP changes.
- Port-forward to the Raspberry Pi’s local IP address.
- Set up certificates to support HTTPS.
- Hope that nobody hacks into your home network 🤞.
Hosting a server from your home network is a nightmare. The Internet is already a scary place with bad people all over the place. It’s risky to allow a vulnerable Raspberry Pi running inside your home which is accessible from the Internet. Once, a rouge Raspberry Pi resulted in NASA hack, beware!
The diagram below shows how port forwarding punches a hole into your router.

What are Cloudflare Tunnels?
Recently, Cloudflare made a boring announcement about offering Cloudflare tunnels (formally, Argo Tunnels) for free!
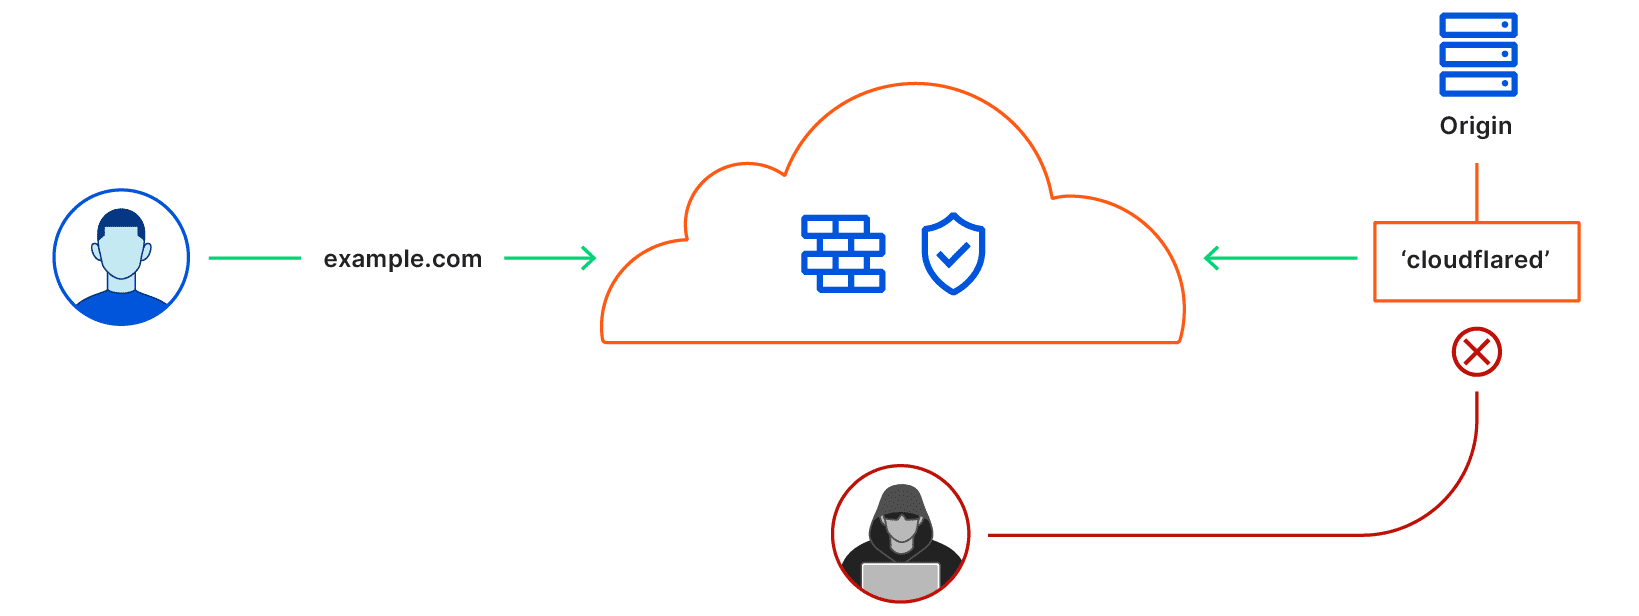
Cloudflare Tunnels create an encrypted tunnel between your server and the Cloudflare network using the cloudflared daemon. Because of this, users won’t directly connect to your server, instead they will connect via proxy through Cloudflare’s network.
This takes away a lot of steps involved in exposing your server from the home.
- There is no need to open any ports on your network. To the outside world and even your ISP, your server just looks like any other encrypted web traffic.
- There is no need to create, buy or mange TLS certificates as
cloudflaredhandles all of this for you. - Cloudflare utilizes smart routing to speed up traffic latency. They avoid congested network and high latency area which routing the traffic through their edge network.
- You get a WAF and DDOS protection built in.
In the diagram below the user can only access the origin(server) through the Cloudflare’s network but not directly. This will provide us an extra layer of security by hiding our origin source and as well as prevent bad actors from accessing the website directly.
Later, I might also take a look into frp: Fast Reverse Proxy, but as on now I’ll stick to Cloudflare Tunnels.
How Tunnels work?
The HTTP tunnels are always initiated from the client side. Here, the cloudflared daemon will initiate the connection to the Cloudflare’s network. My university network would not allow port-forwarding or allow any outside traffic to connect directly. This client side initiation of the connection would help bypass such roadblocks. A single long lived connection is established where many logical sockets are created within one physical socket connection. This method is called Multiplexing.
Source: How ngrok works?
Source: Overview of how ngrok tunneling works
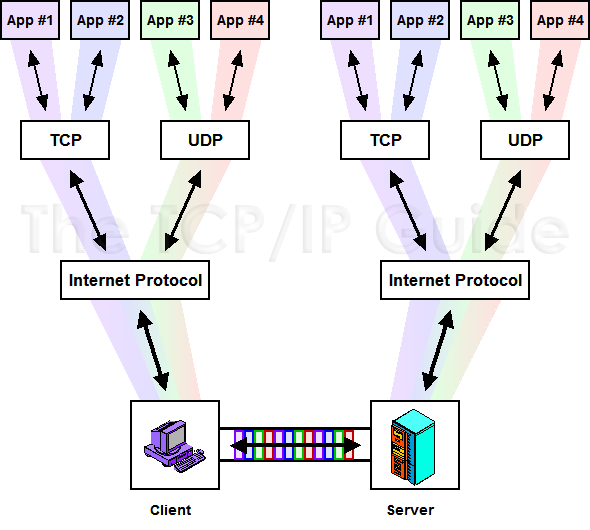
This is similar to TCP multiplexing, where a host with a single TCP connection can manage communication between multiple processes.
With Tunnel, users can create a private link from their origin server directly to Cloudflare without a publicly routable IP address. Instead, this private connection is established by running a lightweight daemon, cloudflared, on your origin, which creates a secure, outbound-only connection. This means that only traffic that routes through Cloudflare can reach your origin.
Tunnel secures your origin by making outbound-only connections to Cloudflare. This removes legacy model requirements of poking ingress rules into your machine often leaving your infrastructure vulnerable to attack.
Read More: The making of Cloudflare Warp
Read More: Traffic encryption between Cloudflare tunnel and HTTPS origin servers
Set up Cloudflared Tunnel
The following steps are required to set-up the tunnel:
- Create a Docker Image of cloudflared
- Login to Cloudflare
- Create a new tunnel
- Create a DNS entry for your tunnel
- Run the tunnel
We will create a new tunnel which will be accessible from pi.example.com.
This can also be done without Docker. Cloudflared can be installed as a service on the Raspberry Pi which do not support Docker.
The official guide is here: https://developers.cloudflare.com/cloudflare-one/networks/connectors/cloudflare-tunnel/get-started-guides/share-new-site/
Build cloudflared Docker image
As of now, Docker hub doesn’t have any arm64 image for cloudflared, let’s build one for ourselves.
# Clone cloudflared repository tunnel
git clone https://github.com/cloudflare/cloudflared.git --depth 1

# Build Docker image on Raspberry Pi
docker build -t "cloudflared:arm64v8"
Login to Cloudflare
Create cloudflared directory and give it 777 permission. This dangerously open permission is required because cloudflared container runs on a nonroot user and this user fails to write on the mounted folder if the folder doesn’t have this permission.
mkdir ~/.cloudflared && chmod -R 777 ~/.cloudflared

# Login to cloudflare
docker run --rm -v ~/.cloudflared:/home/nonroot/.cloudflared cloudflared:arm64v8 tunnel login
You’ll get a cloudflare link to login. Please select the domain you’d like to use. This will authorize cloudflared to create tunnel and new DNS entries.
Create a new Tunnel
# Create a new tunnel with name "pi"
docker run --rm -v /home/ubuntu/.cloudflared:/home/nonroot/.cloudflared cloudflared:arm64v8 tunnel create pi
There will be no issue if the Raspberry Pi restarts or looses internet connection, these named tunnels will help us to reconnect with cloudflare when it reconnects with the internet.
The newly created tunnel would return a UUID, please take a note of this.
Let’s create config file with all the details for the tunnel.
vim ~/.cloudflared/config.yml
In the below template replace the 3aaabf8a-a834-2b7d-6ba8-3fb6b24306ff in config.yml with your tunnel ID.
The target in the config is 192.168.1.111.
tunnel: 3aaabf8a-a834-2b7d-6ba8-3fb6b24306ff
credentials-file: /home/nonroot/.cloudflared/3aaabf8a-a834-2b7d-6ba8-3fb6b24306ff.json

# The Nginx-Proxy-Manager is exposed on port 80, 81 and 443
# I have also added cloudflare SSL certificates to NPM.
- service: https://192.168.1.111
  originRequest:
    noTLSVerify: true
Source: https://github.com/aeleos/cloudflared
Create DNS entry for the tunnel
We can access the tunnel using Cloudflare’s cfargotunnel.com domain as well.
Just add .cfargotunnel.com infront of the UUID. Like: 3aaabf8a-a834-2b7d-6ba8-3fb6b24306ff.cfargotunnel.com
# Create DNS entry for "pi" subdomain
docker run --rm -v /home/ubuntu/.cloudflared:/home/nonroot/.cloudflared cloudflared:arm64v8 tunnel route dns pi pi.example.com
This will add a new DNS entry to your cloudflare account, the entry must be a CNAME. If it’s not CNAME then we have to create a manual entry for the tunnel.

More on Adding DNS Entry: https://developers.cloudflare.com/cloudflare-one/networks/connectors/cloudflare-tunnel/install-and-setup/tunnel-guide/local/get-started/create-local-tunnel/#dns-records
Run the tunnel
# Run tunnel
docker run --restart=always -d --network host -v /home/ubuntu/.cloudflared:/home/nonroot/.cloudflared cloudflared:arm64v8 tunnel run pi
For every new sub-domain, you can run the tunnel route dns command to add it on cloudflare.
More: Run a Tunnel - Cloudflare Documentation
Further read
- Developing a TCP Network Proxy - Pwn Adventure 3. Accessed August 15, 2021. https://www.youtube.com/watch?v=iApNzWZG-10.
- GitHub. “GitHub - Anderspitman/Awesome-Tunneling: List of Ngrok Alternatives and Other Ngrok-like Tunneling Software and Services. Focus on Self-Hosting.” Accessed August 15, 2021. https://github.com/anderspitman/awesome-tunneling.
- Cloudflared documentation
- Share New Site using Cloudflared
- SSH Tunneling - A Deep Dive. Accessed August 16, 2021. https://www.youtube.com/watch?v=PZTBO555q44.
- Cloudflare Origin CA
Resources
- Cloudflare Community. “Argo Tunnel Nested Subdomain,” May 28, 2021. https://community.cloudflare.com/t/argo-tunnel-nested-subdomain/273061/2.
- Cloudflare: How to Set up Cloudflare Argo Tunnel FREE on Unraid - Bypass CGNAT. Accessed August 15, 2021. https://www.youtube.com/watch?v=RQ-6dActAr8.
- Using Free Cloudflare Argo Tunnel to Easily Expose Internal Web Applications to Internet. Accessed August 15, 2021. https://www.youtube.com/watch?v=btGtj_hfEJw.
- Nick. “Self Hosting with Raspberry Pi and Argo Tunnels.” Medium, May 20, 2020. https://medium.com/@durksauce/self-hosting-with-raspberry-pi-and-argo-tunnels-11f06d1309a9.
- Help Center. “How To Set up Argo Tunnels for Remote Access to Local Development Sites,” September 18, 2020. https://servebolt.com/help/how-to-set-up-argo-tunnels-for-remote-access-to-local-development-sites/.
Discussion
Comments
Comments are powered by Disqus and load only when requested.